This guide will walk you through installing your H9000 Gen2 DSP Upgrade Kit. The process takes approximately 10-15 minutes and requires basic tools and careful handling of electronic components.
What’s in the Box
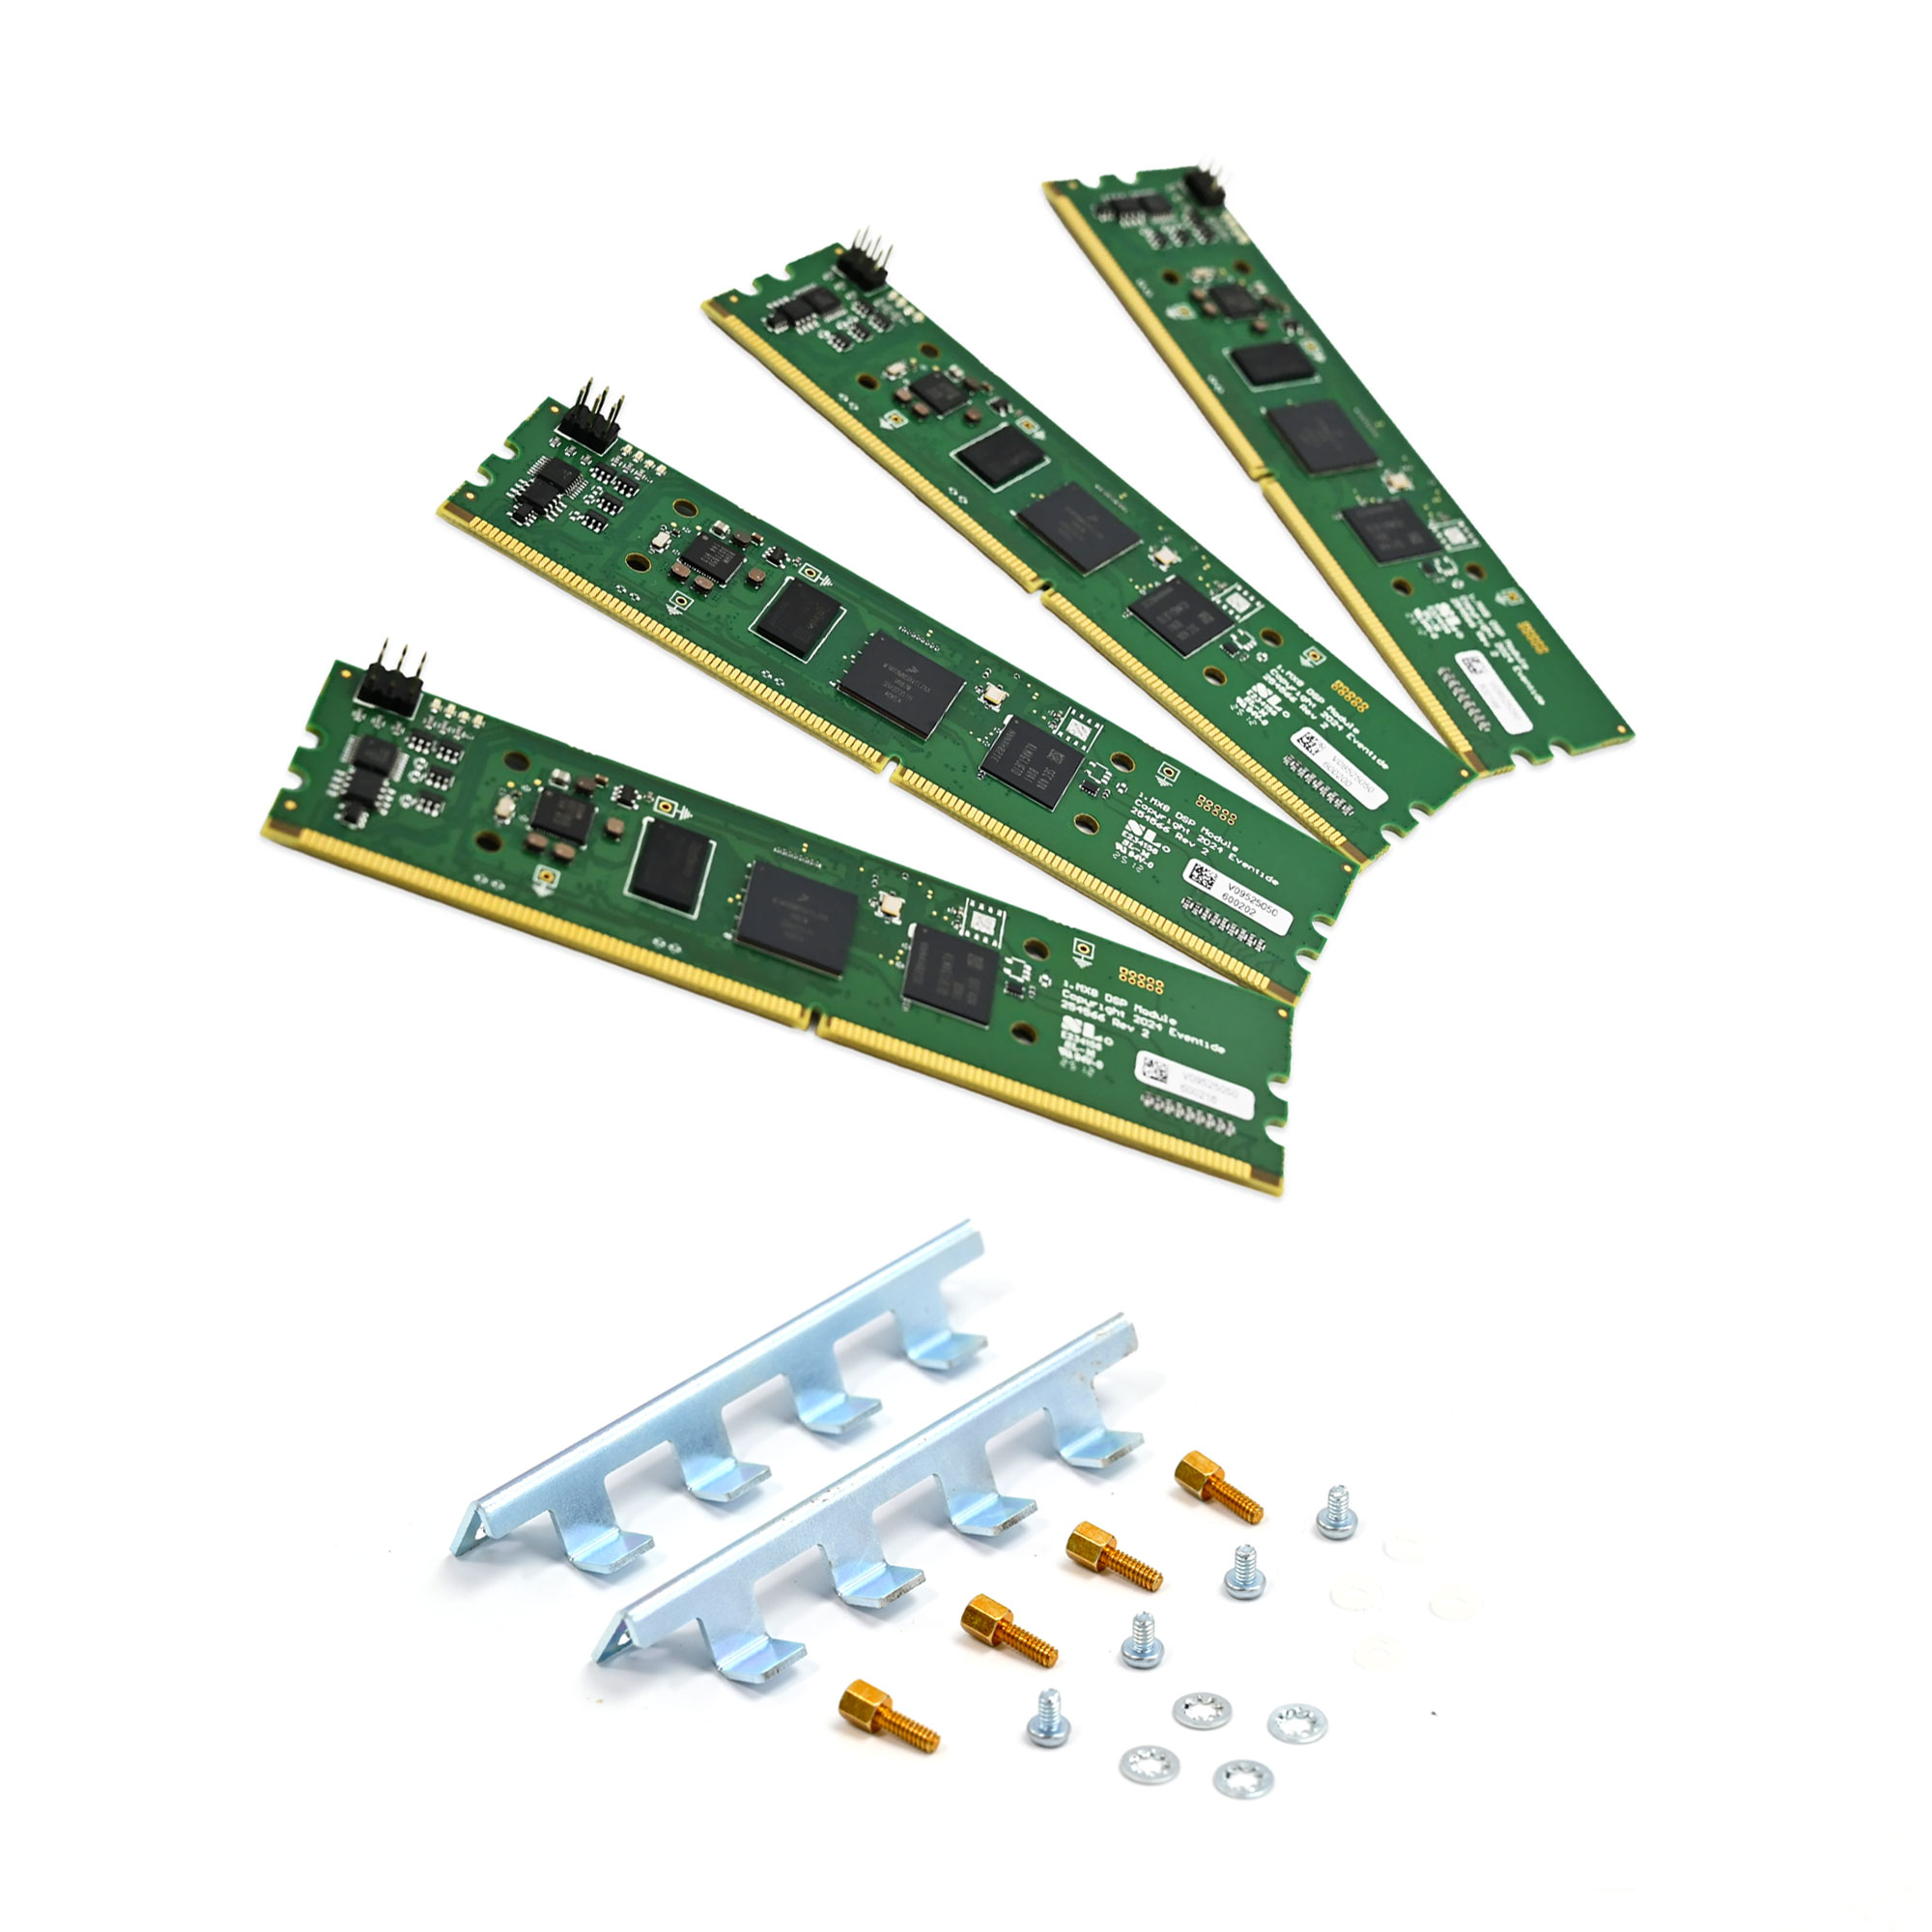
- 4x H9000 Gen2 DSP modules
- 1x Gen2 sticker
- Installation hardware:
- 4x plastic washers
- 4x standoffs
- 4x Phillips head screws
- 4x lock washers
- 2x DSP mounting brackets
Required Tools
- #2 Phillips head screwdriver
- 3/16 socket wrench or nut driver
- Wired anti-static strap
- FAT32-formatted USB drive
Before You Begin
Disconnect the power cable from your H9000 and place it on a steady, level surface in a static-free environment.
Strap the anti-static strap to your wrist and attach the other end to ground.
Important: Do not remove the anti-static strap until you are done with the procedure.
Note: If you do not have an anti-static strap, you can prevent static buildup by periodically touching the outside chassis of the H9000 before touching any components inside the unit.
Step 1: Remove Gen1 Modules
Remove the 10 screws that secure the top plate of H9000, then remove the top plate.
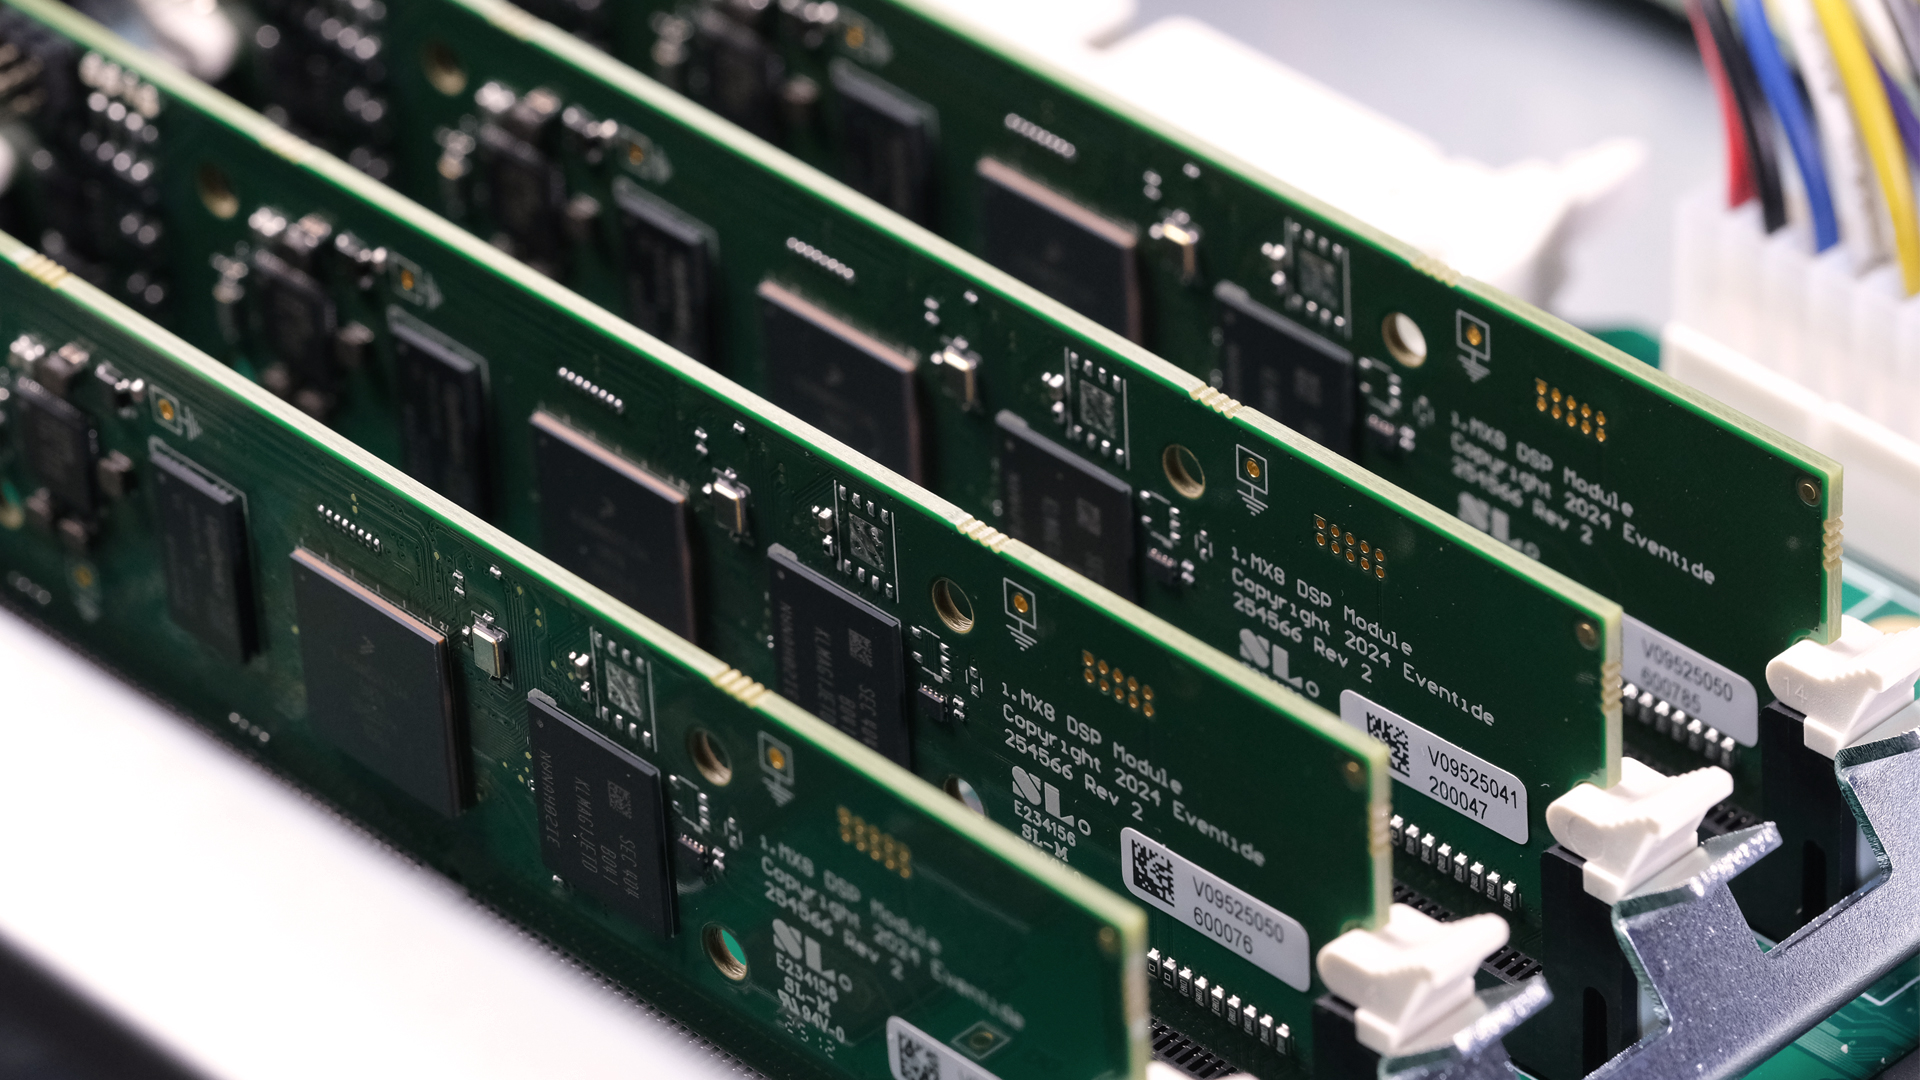
Locate the 4 DSP modules mounted on the motherboard.
If you have an expansion card installed in slot A or B: Remove the expansion card to access the DSP modules by:
- Unlatching the ribbon cable.
- Removing the 2 mounting screws that secure the card to the standoffs.
- Removing the 4 screws on the back of the H9000 to remove your expansion card.
If your H9000 has mounting brackets: Remove the screw and lock washers, then remove the brackets. Store the hardware in a safe space.
Remove each DSP module by unlatching the plastic clip on either side of the card.
Place the Gen1 modules in a safe space temporarily while you install the new modules.
Step 2: Install Gen2 Modules
Remove one Gen2 module from the anti-static bag.
Locate the side of the DSP module that has printed text. This side faces towards the back of the H9000.
Note: Gen2 DSP modules do not require heat sinks since the new modules run at lower temperatures.
Place the module into the slot on the H9000 main PCB and firmly press down on the top of the module to fully insert it into the slot (this requires a small amount of force).
Repeat the install process for the other 3 modules.
Put the old Gen1 modules in the individual static bags that the new modules were shipped in and place them back in the DSP kit box.
Step 3: Secure Modules and Reassemble
Once all 4 modules are installed, reinstall the mounting brackets on either side of the DSP modules.
If your H9000 did not previously have DSP mounting brackets you will need to install four standoffs:
- Remove the 4 screws that surround the DSP modules from the main board.
- Place a plastic washer, then fasten the standoff to the main board.
- Once all 4 standoffs are installed, place the mounting brackets so the 4 prongs line up with the plastic latches that secure the DSP modules.
- Secure the brackets using the lock washer and screw.
Reinstall any expansion cards that were previously removed.
Secure the top panel to the H9000 chassis using the 10 screws that were removed.
Reconnect the power cable and any other physical connections (network and IO).
Power on the H9000.
Place Gen2 sticker on the side of the H9000.
Step 4: Install Firmware
Download the H9000 version 3.0 USB installer here.
Use the FAT32-formatted USB drive that came with your H9000 to install the 3.0 firmware using Recovery Mode. Note that you may run into installation errors if you use a different drive. If you do not have access to this drive, please email support.
Download the latest version of Emote software.
Your H9000 has now been fully upgraded with Gen2 DSP processors and is ready to use!
Need Help?
If you encounter any issues during installation, contact support@eventideaudio.com for assistance.
